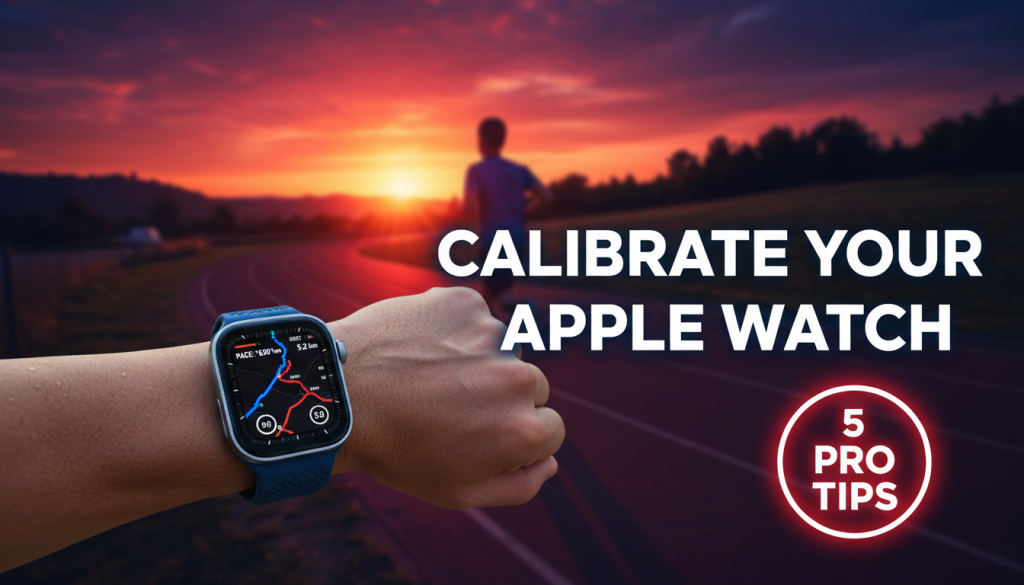
If your pace feels “off,” your distance seems wrong, or your splits don’t match your training buddies, it might be time to dial in your Apple Watch. Learning how to Calibrate Apple Watch: Proven methods can transform your running data from “rough estimate” to “race‑ready precision” — and that means smarter workouts, better pacing, and fewer frustrating surprises on race day.
In this guide, we’ll walk through five detailed, practical calibration strategies so your Apple Watch becomes a tool you can truly trust on every run.
—
Outline
- Why Calibration Matters for Runners
- Before You Start: Prep Your Watch and iPhone
- Tip 1 – Calibrate Apple Watch: Proven 20‑Minute Outdoor Run Method
- Tip 2 – Calibrate Apple Watch: Proven Route and Surface Strategy
- Tip 3 – GPS, Compass, and Motion Settings That Supercharge Accuracy
- Tip 4 – Reset and Re‑Calibrate Apple Watch: Proven Troubleshooting Flow
- Tip 5 – Advanced Tweaks: Heart Rate, Wrist Fit, and Training Apps
- How to Test Your Calibration (And When to Recalibrate)
- Integrating Calibration Into Your Training Plan
- Calibration FAQs for Runners
—
Why Calibration Matters for Runners
For casual step tracking, “close enough” might be fine. For runners, it’s not.
Every interval, tempo run, and long run depends on accurate pace, distance, and heart rate. If your watch is under‑ or over‑reporting by even 3–5%, that error stacks up over weeks and months, leading you to train at the wrong intensities.
Calibrate Apple Watch: Proven techniques do more than tidy your data. They directly influence:
– How fast you run easy days (and whether they’re truly easy)
– Where you set your tempo and threshold zones
– Whether your race‑pace dress rehearsals actually match race pace
– How you track improvements over time
Imagine thinking you’ve been cruising at 7:30/mile only to discover, on race day, that your “7:30” is really 7:55. That’s not just frustrating — it can derail a carefully built training cycle.
—
Before You Start: Prep Your Watch and iPhone
Before diving into the five tips, make sure your Apple Watch and iPhone are set up correctly. Calibration builds on these basics.
Update Your Watch and iPhone
Make sure watchOS and iOS are on the latest stable versions:
– On iPhone: Settings > General > Software Update
– On Apple Watch: Settings > General > Software Update
Updates often contain GPS, motion, and workout tracking improvements. Calibrating on old software can lock in subpar performance.
Turn On Location Services (Correctly)
On your iPhone:
1. Go to Settings > Privacy & Security > Location Services and turn it on.
2. Scroll to Apple Watch Workout (or Fitness on some versions).
3. Set it to While Using the App, and enable Precise Location.
This allows your watch to use high‑quality GPS data from your phone when needed, especially on older Apple Watch models.
Set Your Personal Data Accurately
Apple’s stride and calorie estimates depend heavily on your stats:
1. Open the Watch app on iPhone.
2. Tap My Watch > Health > Health Details.
3. Confirm height, weight, age, and gender are up to date.
Small errors here can skew pace, distance (via stride length), and calorie burn.
Wear the Watch Correctly
For both heart rate and motion tracking:
– Wear it on the top of your wrist, and snug (but not painful).
– Ensure the sensor is flush with your skin.
– Avoid overly loose watch bands; they cause motion noise and HR dropouts.
A correctly fitted watch is step zero in any Calibrate Apple Watch: Proven approach.
—
Tip 1 – Calibrate Apple Watch: Proven 20‑Minute Outdoor Run Method
Apple’s own calibration system is built around a simple idea: run outside with good GPS, and let the watch learn how you move. But most runners rush this step or do it half‑heartedly.
Here’s the step‑by‑step calibration run you should do when you:
– Get a new Apple Watch
– Change shoes drastically (e.g., minimal to max‑cushion “super shoes”)
– Switch running surfaces (e.g., treadmill winter to outdoor spring)
– Recover from injury, which may change your gait
Step 1: Choose the Right Route
Pick a flat, open route with a clear view of the sky:
– Minimal tall buildings, trees, or tunnels
– No frequent stops or sharp turns
– Ideally, a measured track or a reliable known‑distance path
This is your baseline calibration session; treat it like an important workout.
Step 2: Start the Outdoor Run Workout
On Apple Watch:
1. Open the Workout app.
2. Select Outdoor Run.
3. Tap the three dots (…) and choose a duration if you want (e.g., 25 minutes), or leave it open‑ended.
4. Wait a few seconds for GPS lock (especially if you’ve just stepped outside).
Step 3: Run for at Least 20 Minutes at Your Normal Pace
The watch needs enough data to map your arm swing and stride length to actual distance.
– Run continuously for 20–25 minutes.
– Use your typical easy or regular training pace — not sprinting, not shuffling.
– Try to avoid long pauses, traffic lights, or walking segments.
If your training includes varied paces, consider doing two calibration runs:
– One at easy pace.
– One at tempo/steady pace.
This helps Apple Watch learn your stride across speeds.
Step 4: Avoid Using Power‑Saving or Low Power Mode
During calibration, don’t use:
– Low Power Mode (watchOS)
– Power Saving Mode in Workout settings
These can reduce GPS and heart rate sampling, which undermines calibration.
Step 5: Repeat for Best Results
While a single 20‑minute run does a lot, repeating this on a few separate days gives better coverage, especially if you run on different surfaces (asphalt vs packed dirt).
This core “20‑minute method” is the foundation for every other way you Calibrate Apple Watch: Proven for real‑world running.
—
Tip 2 – Calibrate Apple Watch: Proven Route and Surface Strategy
Once you’ve done a clean 20‑minute calibration run, you can refine accuracy by being strategic about where and how you run.
Use Measured Courses to Verify Distance
A smart way to test (and fine‑tune) calibration is to run on routes with known distances:
– A standard 400m or 800m athletic track
– Certified 5K/10K race courses
– Measured bike paths or park loops
Over time, aim for the average of multiple tests. One day of GPS noise doesn’t mean your watch is off forever.
If you are building up to your first 5K, pairing a well‑calibrated watch with a structured plan can keep pace and distance consistent. A resource like 5K Training Plan Designed: 7 Proven, Powerful Weight Loss Steps can complement your calibration work by giving your watch accurate targets to guide.
Account for Different Surfaces
Stride length and contact time can change significantly when you move between:
– Road / asphalt
– Gravel
– Treadmill
– Trail
Apple Watch relies more heavily on motion sensors when GPS is unreliable or when running indoors. To keep your indoor and outdoor data consistent:
– Do at least one 20‑minute outdoor calibration run before heavy treadmill season.
– Periodically run brief outdoor sessions (10–20 minutes) to “refresh” calibration.
– If you frequently switch between trail and road, calibrate on both.
Train at Multiple Speeds
If you only calibrate at one speed (e.g., easy jog), the watch may struggle to estimate distance accurately at other paces.
A practical approach:
– Day 1: 20–25 minutes easy pace.
– Day 2: 10 minutes easy, then 10–15 minutes tempo/steady.
– Day 3+: Include short strides or moderate intervals on open straight paths.
You’re essentially showing the watch: “Here’s how my stride changes across zones.”
Beware Obstructed Environments
Even well‑calibrated watches struggle where GPS is bad:
– Dense city centers (“urban canyons”)
– Narrow trails in deep forest
– Stadiums, tunnels, or underpasses
If you Calibrate Apple Watch: Proven style on a clean route, you’ll minimize the damage. In bad GPS conditions, the watch leans more on your calibrated stride model, which is exactly why this work matters.
—
Tip 3 – GPS, Compass, and Motion Settings That Supercharge Accuracy
Calibration isn’t only about running with your watch. Your underlying settings affect how well the watch can even attempt to be accurate.
Enable Motion Calibration & Distance
On your iPhone:
1. Go to Settings > Privacy & Security > Location Services.
2. Scroll down to System Services.
3. Make sure Motion Calibration & Distance is turned on.
This is critical for steps, distance, and indoor run calculations. If it’s off, your watch is basically guessing.
Use the Best Available GPS Option
On newer Apple Watch models (especially Ultra line), you may see GPS options like:
– Apple Watch only
– Apple Watch with iPhone
– Dual‑frequency GPS (L1 + L5) on supported devices
For calibration runs, let the watch access the best available GPS — don’t manually downgrade unless you have a specific reason.
Calibrate the Compass (If Available)
While not as central as motion sensors, a properly calibrated compass can help with route tracking in some conditions:
– Open the Compass app on Apple Watch.
– Follow any on‑screen prompts to move your wrist/arm.
– Keep magnets and metal objects away from the watch during runs (e.g., certain phone mounts, magnetic straps).
Turn Off Excessive Power Saving During Workouts
In the Watch app on iPhone:
1. Go to My Watch > Workout.
2. Make sure Low Power Mode and older Power Saving Mode toggles are off when accuracy matters.
These modes can disable continuous heart rate and reduce GPS sampling — fine for all‑day battery, not fine for data‑driven training.
If you want an in‑depth, settings‑specific walkthrough, see Apple Watch Running Settings: 7 Essential, Proven Tweaks, which pairs perfectly with this guide.
—
Tip 4 – Reset and Re‑Calibrate Apple Watch: Proven Troubleshooting Flow
Sometimes, despite doing everything “right,” your Apple Watch data still feels off. In those cases, a reset of fitness calibration data can give you a fresh start.
When to Consider a Reset
You might want to reset calibration data if:
– Distance is consistently off by more than 5–8% on reliable routes.
– Your pace jumps erratically without matching effort changes.
– You’ve dramatically changed your running form, shoes, or bodyweight.
– You moved from a very hilly/urban environment to an open/flat one.
How to Reset Fitness Calibration Data
On your iPhone:
1. Open the Watch app.
2. Tap My Watch > Privacy.
3. Tap Reset Fitness Calibration Data.
4. Confirm when prompted.
This doesn’t delete workouts; it just clears the “learning” the watch has done about your stride and motion.
Re‑Run the 20‑Minute Calibration Protocol
After the reset, immediately schedule a new calibration run:
– Choose a clear, open route.
– Run 20–25 minutes continuously at your usual pace.
– Avoid pausing, walking, or heavy intervals during this first run.
Follow up with one or two more calibration runs across your typical pace range, as described earlier. This is the core of a Calibrate Apple Watch: Proven troubleshooting flow: reset, clean baseline, then refine.
Compare Against Trusted Benchmarks
Once re‑calibrated, compare your watch against:
– A measured track (4 laps = 1600m, not a full mile)
– Past race results on the same route
– A friend’s reliable GPS watch, over multiple runs
Look for consistency, not perfection. GPS and wearable data are always approximate, but they should be predictably close, not random.
—
Tip 5 – Advanced Tweaks: Heart Rate, Wrist Fit, and Training Apps
Distance and pace are only part of the picture. Most modern training approaches use heart rate, power, and long‑term metrics. If these are off, your entire training plan can drift.
Optimize Heart Rate Accuracy
Apple’s optical heart rate sensor is solid, but it needs help:
– Wear the watch snugly, one finger above the wrist bone.
– In colder weather, warm up before starting the workout; cold skin = poor readings.
– Avoid wearing the watch over thick tattoos on the sensor area (they can interfere).
For interval workouts or if you’re very HR‑driven, consider pairing an external chest strap via Bluetooth. This won’t change GPS calibration, but it majorly improves training data quality.
Choose the Correct Wrist and Hand
In the Watch app on iPhone:
1. Tap My Watch > Watch Orientation.
2. Select the wrist you’re actually using (left/right).
3. Confirm whether the Digital Crown is on the left/right side.
This orientation setting influences motion interpretation. If it’s wrong, your arm swing data — a key component of stride estimation — becomes noisier.
Leverage Third‑Party Training and Analysis Apps
Apple’s Workout app is good, but many runners use specialized coaching or analysis tools that depend on reliable input data. Once you Calibrate Apple Watch: Proven style, these tools become more effective:
– Coaching platforms that build dynamic plans around your pace/HR.
– Data analysis apps that highlight trends and fatigue.
– Navigation/routing apps for trail and ultra runners.
If you’re considering an intelligent training app or custom plan that adapts to your data quality, it’s worth checking out what’s available and how it integrates with Apple Watch. Tools like Custom Plan can turn your now‑accurate watch data into smarter, more personalized training.
Use Consistent Workout Types
Whenever you run:
– Use Outdoor Run for outdoor runs.
– Use Indoor Run for treadmills.
– Avoid logging runs as generic “Other.”
Apple’s algorithms expect specific motion and GPS behavior from each workout type. Mislabeling sessions confuses the calibration model over time.
—
How to Test Your Calibration (And When to Recalibrate)
Once you’ve put in the work, you’ll want to know: is it actually better?
Test on a Track or Measured Loop
A straightforward test protocol:
1. Warm up for 5–10 minutes (not necessarily on the loop).
2. Start a new Outdoor Run on your Apple Watch.
3. Run 4–8 laps at a steady pace, counting them carefully.
4. Stop the workout and check the distance.
Expect minor deviation (e.g., 1.58–1.62 km instead of 1.60 km). That’s normal GPS variation. Consistent under‑ or over‑reporting, especially more than 3–4%, may warrant another brief calibration run.
Compare With Past Races or Known Courses
If you’ve raced a certified 5K, 10K, half, or full:
– Run the same course, or a large part of it, in training.
– Compare watch distance to official race distance.
Remember that racing lines, course measurement rules, and weaving through crowds can slightly alter your actual distance, so don’t panic over small differences.
Recognize When It’s Time to Recalibrate
Recalibrate when:
– You switch primary shoes (e.g., from daily trainers to carbon‑plated racers) and notice stride changes.
– You change running terrain for an entire season.
– You have a layoff after injury and your form/fitness returns slowly.
– Your pace vs. perceived effort seems consistently “off” by more than usual.
A brief 10–20 minute calibration run once every month or two, especially after major changes, keeps your “stride model” current.
—
Integrating Calibration Into Your Training Plan
Calibrating isn’t a separate hobby; it should quietly support your actual running goals.
Use Calibrated Data to Set Smarter Zones
Once your Apple Watch is dialed in, revisit your:
– Pace zones (easy, steady, tempo, interval)
– Heart rate zones (if you’re training by HR)
– Race‑pace targets for upcoming events
Because your distance and pace readings are more trustworthy, you can better match effort to training prescriptions, avoiding common traps like turning easy days into medium days.
Align Calibration With Training Phases
You don’t need to obsess over calibration every week. A good rule:
– Base phase: One initial 20‑minute calibration run, plus one follow‑up at a slightly faster pace.
– Build phase: Brief checks on measured loops every 3–4 weeks.
– Race phase: Confirm calibration before your key race‑pace workouts and tune‑up races.
This keeps your data reliable throughout the season without distracting from the actual work.
Pair Calibration With Injury Prevention and Consistency
Accurate pace and distance help you notice patterns like:
– Cumulative weekly mileage spikes (injury risk)
– Pace drifting faster over time on “easy” days (overtraining risk)
– Slowing pace at the same HR (fatigue or under‑recovery)
Good calibration supports smart decision‑making. For broader strategies on staying healthy while using your data wisely, see Running Injury Prevention Strategies: 7 Proven, Powerful Tips, which dovetails nicely with this tech‑focused guide.
—
Calibration FAQs for Runners
Does Apple Watch calibration affect treadmill runs?
Yes. When GPS isn’t available (like indoors), Apple Watch leans heavily on your calibrated motion and stride model. If you’ve done clean outdoor calibration runs, your treadmill distance and pace will be closer to reality — though treadmill consoles themselves can be inaccurate, so expect some disagreement.
Do I need my iPhone with me to calibrate?
It depends on your watch model:
– Newer Apple Watch models with strong GPS can calibrate quite well solo.
– Older models benefit from having the iPhone nearby on initial calibration runs.
However, even on new models, having the iPhone during the first 20‑minute calibration can provide richer GPS data, which the watch can then “learn” from.
How often should I Calibrate Apple Watch: Proven style?
You don’t need to do it constantly. A practical guideline:
– New watch: 2–3 calibration runs in your first week.
– Major changes (shoes, terrain, big weight changes): 1–2 short calibration runs.
– Maintenance: brief 10–20 minute outdoor calibration run every 4–8 weeks, or after extended time off.
Why is my watch distance different from race distance?
Even perfectly calibrated devices can read slightly long or short on race day because of:
– Weaving around other runners
– Not running the shortest possible line
– GPS noise in crowded or urban areas
– Start/finish line GPS offsets
Most runners will see 0.3–1% variation over longer races. That’s normal. Large, consistent deviations suggest calibration or GPS environment issues.
Will resetting calibration delete my past workouts?
No. Resetting fitness calibration data only clears the internal model Apple Watch uses to estimate distance and pace from your motion. All previous workouts and health data remain intact.
Is Apple Watch accurate enough for serious training?
With good calibration and smart settings, yes — for most runners and most scenarios. Many athletes successfully use Apple Watch for:
– Marathon and half‑marathon training
– Interval sessions on the road or track
– Tempo and threshold work
– Long‑term progress tracking
Ultra‑specialized use cases (like trail ultras in heavy tree cover) may benefit from dedicated GPS devices, but for the majority of runners, a properly calibrated Apple Watch provides more than enough precision.
—
Bringing It All Together
To Calibrate Apple Watch: Proven for amazing runs, you don’t need complex hacks — just deliberate setup and a few focused calibration sessions:
1. Prepare your watch and iPhone (updates, Location Services, Health data).
2. Run at least one clean 20–25 minute outdoor calibration run at your typical pace.
3. Refine calibration on measured routes and multiple surfaces/speeds.
4. Use the reset‑and‑recalibrate flow if your data drifts badly.
5. Fine‑tune advanced settings like HR, wrist orientation, and workout modes.
Once you’ve done this, your Apple Watch becomes a far more trustworthy training partner. Distances align, paces make sense, and your plan — whether it’s a first 5K or a big marathon push — rests on solid, dependable data.
From there, your focus can shift back where it belongs: building fitness, staying healthy, and enjoying the feeling of nailing your runs, one accurate split at a time.