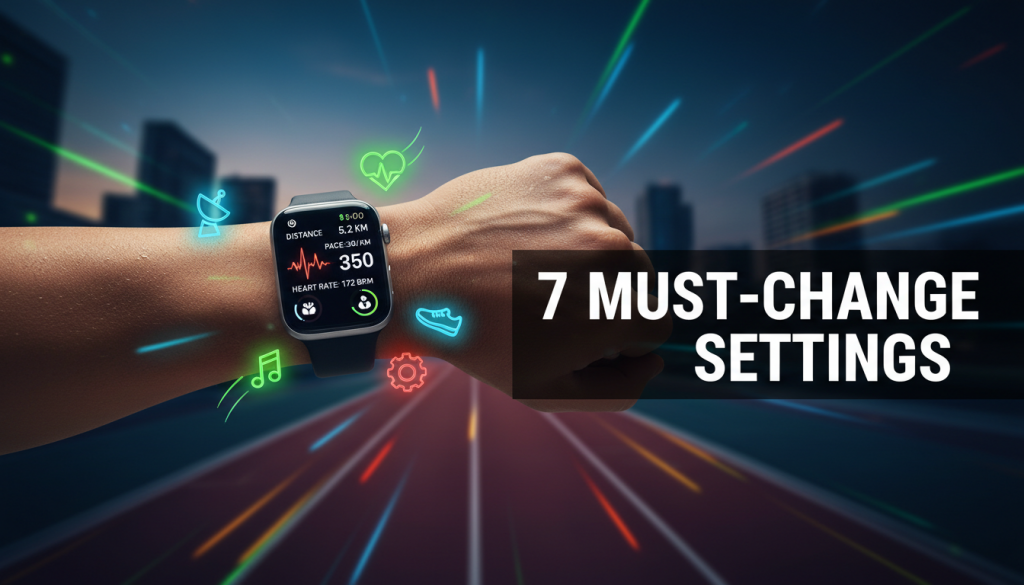
For runners, the right Apple Watch tweaks can quietly turn a good run into a great one. The Best Apple Watch Settings: for running are not buried in obscure menus—they’re a set of simple, proven changes that make your data clearer, your pacing smoother, and your training more focused. Whether you’re training for a 5K, chasing a marathon PR, or simply trying to stay consistent, the Apple Watch can be your most powerful piece of running gear—if you set it up correctly.
Outline / Table of Contents
- Why Apple Watch Settings Matter So Much for Runners
- Core Principles Behind the Best Apple Watch Settings: for Running
- Tweak #1 – Build a Run‑First Workout View (Fields That Actually Help You)
- Tweak #2 – Precision Start, Auto‑Pause & Auto‑Lap: Control Your Timing
- Tweak #3 – Heart Rate Zones, Pace Alerts & Effort Control
- Tweak #4 – Route, GPS, and Safety Settings for Outdoor Runs
- Tweak #5 – Battery, Screen, and Focus Modes for Long Runs
- Tweak #6 – Recovery, Sleep, and Health Insights That Shape Smarter Training
- Tweak #7 – Workout Types, Intervals, and Race‑Day Configurations
- Best Apple Watch Settings: Within Your Bigger Running Gear Strategy
- Sample Configurations for 5K, 10K, Half, and Marathon Runners
- Troubleshooting Common Apple Watch Running Problems
- Next Steps: Turn Settings into Real Training Progress
Why Apple Watch Settings Matter So Much for Runners
An Apple Watch out of the box is a great general fitness tracker, but not automatically a great running watch. The Best Apple Watch Settings: for runners focus on three things: reducing distractions, improving data quality, and helping you run at the right effort on every run.
If your watch constantly lights up with notifications, shows too many metrics, or gives inconsistent GPS or heart rate readings, you’re training off noisy data. Over weeks and months, that leads to pacing errors, poor race execution, and avoidable injuries.
Dialed‑in settings, on the other hand, turn your watch into a quiet coach: a few key alerts, clear screens, and just enough feedback to keep you honest without pulling you out of the run.
Core Principles Behind the Best Apple Watch Settings: for Running
Before we dive into the specific tweaks, it helps to understand the principles they’re based on. The Best Apple Watch Settings: for running share four ideas:
- Clarity over clutter – Fewer, more meaningful data fields beat a dashboard full of tiny numbers.
- Effort over ego – Use heart rate and pace alerts to stay in the right zones, not to chase vanity speeds.
- Consistency over perfection – You don’t need perfect GPS tracks; you need reliably similar data each week.
- Protection over distraction – Cut notifications and unnecessary taps so you stay mentally in the run.
Every setting below flows from at least one of these principles. You’re building a system that supports long‑term running, not just one great workout.
Tweak #1 – Build a Run‑First Workout View (Fields That Actually Help You)
Why Your Workout View Is the Foundation
Most runners leave the default workout screens untouched. That usually means too many fields and the wrong information emphasized. The Best Apple Watch Settings: start with a clean, customized Workout view that you actually understand mid‑stride.
You’ll configure this in the Watch app on your iPhone under Workout > Workout View > Outdoor Run (or Indoor Run).
Step‑by‑Step: Create a Primary “Easy Run” Screen
Your main screen should prioritize pacing by effort and staying relaxed:
- Field 1 (biggest): Heart Rate or Pace
For newer runners, use Heart Rate. For experienced runners, use Average Pace or Rolling Pace. - Field 2: Distance
Distance anchors your run and helps with mental checkpoints. - Field 3: Duration (Time)
Most training plans are time‑based just as often as distance‑based. - Field 4 (optional): Current Lap Pace or Cadence
Lap pace helps control surges; cadence helps you stay smooth.
Keep this screen simple and use it for most runs, especially easy days. Want a deeper dive into why easy runs matter so much? This is where a good setup supports the principles in What an Easy Run Really Is: 5 Essential Proven Benefits.
Create a Secondary “Workout / Intervals” Screen
For structured sessions, build a second screen that emphasizes intensity control:
- Heart Rate Zone
- Split / Lap Time
- Lap Distance
- Current Pace (or Rolling Pace)
You can then swipe between your basic screen and your workout screen, instead of cramming eight tiny metrics into one place.
Consider a “Minimalist Racing” Screen
On race day, information overload destroys pacing. For racing, use:
- Field 1 (large): Current Lap Pace or Rolling Pace
- Field 2: Distance
- Field 3: Overall Time
And that’s it. Your goal during a race isn’t to analyze; it’s to execute.
Tweak #2 – Precision Start, Auto‑Pause & Auto‑Lap: Control Your Timing
Why Timing Settings Matter More Than You Think
Even small timing inconsistencies—starting late, forgetting to un‑pause, or mis‑counting laps—can throw off pacing decisions and training logs. Proper timing settings give you clean data without constant fiddling with your watch.
Turn Off “Press to Pause” Confusion
In the Watch app, under Workout, there’s an option to pause and resume by pressing the Digital Crown and side button. Many runners accidentally trigger this while adjusting sleeves.
Consider leaving “Press to Pause” off and using the touch screen or Digital Crown alone to stop your workout. Fewer accidental pauses means more accurate results.
Use Auto‑Pause Carefully
Auto‑Pause seems useful, but it can create unrealistic paces if you’re in a stop‑and‑go environment. Guidelines:
- Urban runs with many lights: Auto‑Pause ON (so you don’t log standing time).
- Steady training routes / trails: Auto‑Pause OFF (for more honest pacing).
- Speed workouts: OFF is usually better, to capture full interval recovery behavior.
Auto‑Pause is in Workout > Auto‑Pause. Test it carefully to see how responsive it is on your routes.
Configure Auto‑Lap for Smarter Feedback
Auto‑Lap helps you get split information without pressing buttons. Most runners benefit from:
- 1 km or 1 mile auto‑laps for regular distance runs.
- Manual laps for interval sessions where repeats are shorter or varied.
In Workout View > Outdoor Run > Auto‑Lap, choose distance‑based laps and pick the unit that matches your plan (km or miles).
Set up sounds and haptics so you get a gentle tap and tone at each lap, then glance down for split pace. That quiet nudge is often enough to keep you honest when you’re drifting too fast on easy days or too slow in workouts.
Use “Precision Start” With Intention
Some runners like to start the workout and then wait on the line or at the door; others want the timer to begin exactly when they move. Get used to the routine:
- Open your workout type (Outdoor Run).
- Wait for GPS lock (especially in new areas).
- Start the workout just as you begin moving.
The habit is more important than a specific setting; consistency keeps your data comparable run to run.
Tweak #3 – Heart Rate Zones, Pace Alerts & Effort Control
Why Effort Control Is the Real “Secret Setting”
Overtraining rarely happens because someone owned the wrong shoes; it happens because they ran too hard, too often. The Best Apple Watch Settings: for effort—heart rate zones and pace alerts—help you stay in the right training zones effortlessly.
Set Up Personalized Heart Rate Zones
Apple automatically generates HR zones, but they’re often based on generic formulas. To improve them:
- In the Watch app or Health app, check your maximum heart rate and resting heart rate.
- Adjust zones manually if you have lab or tested values (e.g., from a recent race or test).
- Tick “Show Zones” during workout so you can see which zone you’re in at a glance.
During easy runs, you should spend most of your time in lower zones. For a deeper dive into why this matters long‑term, see Why Long Term Running Needs 7 Essential Proven Habits. Good HR zone usage is one of those habits.
Use Heart Rate Alerts for Easy Days
In the Workout settings, you can configure heart rate alerts for high or low thresholds. On easy days, consider:
- Set a high HR alert at the top of your easy zone.
- If the watch buzzes, down‑shift: slow down or even walk briefly.
This is especially useful in heat, humidity, or hilly routes where pace alone can mislead you.
Use Pace Alerts for Key Workouts and Races
For tempo runs, threshold sessions, and races:
- Determine your target pace range from recent races or calculators.
- In Workout > Alerts > Pace, set a range (e.g., 4:45–4:55 min/km).
- Enable alerts so the watch vibrates if you drift out of that window.
Pace alerts keep you from going too fast early in a session or race—a classic mistake that ruins later splits. When training for a marathon, this kind of control pairs nicely with smart tapering, like the strategies in Marathon Taper Guide for 7 Proven Ways to an Amazing PR.
Combine HR and Pace Without Obsessing
You don’t need to stare at your wrist every minute. Use a simple strategy:
- Easy runs – Glance at HR zones occasionally, respond to alerts only.
- Workouts – Follow pace alerts and verify that your HR stays in expected ranges.
- Races – Trust pace alerts; use HR more as a sanity check in later miles.
Your goal is to internalize effort, using the watch as a quiet correction, not a constant command.
Tweak #4 – Route, GPS, and Safety Settings for Outdoor Runs
Get the Best GPS Performance Available
Modern Apple Watch models use multi‑band GPS (depending on model and region). To keep GPS consistent:
- In Settings > Privacy > Location Services, make sure Workout has access to Location “While Using.”
- Avoid starting your run between tall buildings or under dense trees if possible—step into the open for 20–30 seconds before hitting “Start.”
- Update watchOS regularly; GPS algorithms improve over time.
Don’t obsess over one weird track; look for patterns over weeks. Consistency is more important than perfect satellite art. (Change Apple Watch settings)
Use Route and Backtrack for New Areas
Newer Apple Watch models offer Backtrack and improved Maps integration. Before exploring a new trail or neighborhood:
- Open the Compass app and enable Backtrack if you’re going off‑road.
- Use Maps or third‑party apps to load basic routes.
- Make sure Cellular or your paired iPhone is available if you’re relying on live maps.
These settings let you explore with confidence without constantly checking your phone.
Configure Safety: Fall Detection and Emergency SOS
Running often takes you away from busy areas. Set up safety features before you need them:
- Fall Detection – Enable in the Watch app > Emergency SOS. Consider turning “Always On” if you run on trails or alone regularly.
- Emergency Contacts – Add them in the Health app. This ensures SOS alerts the right people.
- Medical ID – Fill in allergies, medications, and conditions.
A single configuration session here can make a critical difference if something goes wrong mid‑run.
Turn Off Unnecessary Location Sharing
For privacy and battery, review which apps can use your location. Only keep location enabled for:
- Workout / Fitness
- Maps / Navigation apps you actually use
- Safety‑critical services
If you care deeply about data handling and privacy around your training, it’s also worth periodically reviewing documents like a platform’s Privacy Policy so you know how your information is stored and used.
Tweak #5 – Battery, Screen, and Focus Modes for Long Runs
Why Long‑Run Settings Are Different
A 30‑minute run and a 3‑hour long run stress your watch very differently. The Best Apple Watch Settings: for long runs prioritize battery and focus so your watch lasts the distance and doesn’t drive you crazy.
Optimize Screen Behavior
Two key options influence both battery and distraction:
- Always On Display – On newer models, turn this off for very long runs if battery is tight.
- Wake on Wrist Raise – Keep ON so you can glance quickly, but reduce brightness.
In Settings > Display & Brightness:
- Set brightness to the lowest level that’s still readable.
- Reduce “Wake Duration” to a shorter period (e.g., 15 seconds).
These settings save battery without sacrificing usability.
Use Focus Modes: “Run Mode” for Your Brain
Notifications during a run fragment your attention and increase perceived effort. Set up a dedicated Focus mode for running:
- In your iPhone’s Focus settings, create a “Running” mode.
- Allow only critical contacts (e.g., family) and emergency apps.
- Link this Focus to the Workout app so it activates automatically when you start a run.
This simple change turns your run into a genuinely quieter, more meditative experience—without forcing full airplane mode.
Battery Tips for Very Long Efforts
If you’re pushing toward marathon or ultra distances:
- Start with 100% battery when possible.
- Disable music streaming; pre‑download playlists to your watch.
- Turn off unnecessary background apps and Wi‑Fi.
- Use low‑power workout mode (available on some models) with slightly reduced metrics if battery is critical.
Test these setups on long training runs well before race day, so there are no surprises when it matters.
Tweak #6 – Recovery, Sleep, and Health Insights That Shape Smarter Training
Why Recovery Settings Matter as Much as Workout Settings
Most runners obsess about the run itself and ignore the 20+ hours around it. The Apple Watch quietly tracks sleep, HRV, and resting heart rate—all of which can guide whether today should be hard, easy, or rest.
The Best Apple Watch Settings: for recovery make this data visible and actionable, without overwhelming you.
Turn On Sleep Tracking and Wind Down
In the Health app or Watch app, configure:
- Sleep Schedule – Set consistent bed and wake times.
- Wind Down – Enable to dim notifications and screens before bed.
- Sleep Focus – Silence alerts except from critical contacts.
Wearing your watch overnight gives you useful trends:
- Resting heart rate trends (should generally go down as fitness improves).
- HRV trends (sudden drops can signal fatigue or illness).
- Total sleep time and regularity.
Use Morning Check‑Ins
Get into the habit of a 10–20 second morning scan:
- Check resting heart rate compared to your personal baseline.
- Glance at sleep duration and quality (especially if you feel off).
- Notice trends: several poor nights in a row suggest adjusting training.
If metrics and how you feel both point toward fatigue, swap a hard workout for an easy run or rest. You’ll reduce injury risk and improve long‑term consistency.
Leverage HRV and “Readiness” Without Obsession
HRV is a noisy metric day‑to‑day. Focus on trends:
- A gradual upward trend over weeks usually signals improving fitness and recovery.
- A sharp drop plus high resting HR can flag stress, illness, or overreaching.
Use this as a guide, not a commandment. If HRV says “good” but you feel broken, trust your body.
Customize Health Alerts
In the Health app, enable:
- High Heart Rate alerts (especially useful for beginners).
- Low Heart Rate alerts (for safety when resting).
- Irregular Rhythm notifications if available in your region.
These alerts aren’t just for medical concerns; they can also reveal when training or life stress is pushing your body too hard between runs.
Tweak #7 – Workout Types, Intervals, and Race‑Day Configurations
Choose the Right Workout Type for Each Session
The Workout app offers multiple presets beyond just “Outdoor Run” and “Indoor Run.” For runners, the important distinction is usually between:
- Outdoor Run – GPS and HR for distance work and races.
- Indoor Run – Treadmill or track work where GPS is inaccurate.
- Custom Workouts – Interval sessions with defined warm‑ups, repeats, and cool‑downs.
Logging the right type keeps your training history accurate and helps third‑party coaches and apps analyze your load correctly. (Customize faces and features)
Build Structured Interval Workouts
Instead of manually hitting Lap and trying to remember your plan mid‑session, use the built‑in structured workout feature (or a compatible app):
- In the Workout app, choose Outdoor Run.
- Scroll down to “Create Workout” or “Add” to build intervals.
- Set warm‑up duration or distance.
- Add repeats with distance/time targets and rest intervals.
- Finish with a cool‑down segment.
During the run, your watch will guide you into each rep and rest segment with haptics and on‑screen cues, so you can focus on running instead of math.
Set Race‑Specific Alerts and Screens
For race day, tweak settings specifically for the event:
- 5K: Use pace alerts tightly around your goal pace; screen shows current lap pace, distance, time.
- 10K: Slightly broader pace alerts; pay attention to early restraint and strong finish.
- Half/Marathon: Emphasize conservative early pacing; consider HR as a backup guardrail.
Turn off non‑essential alerts and apps. Enable Focus mode so your only interruptions are pace and HR alerts that support your strategy.
Use Custom Metrics for Specific Goals
Depending on your focus:
- Form / efficiency: Add Cadence and Ground Contact (if supported via apps/sensors).
- Weight loss / calorie burn: Keep HR and time visible; distance is less crucial.
- Speed development: Use lap pace and interval structures; total time matters less than quality.
The settings that support a marathon build will differ from those best for a short, intense 5K block; treat your watch configuration as part of your training phase, not something you set once and forget forever.
Best Apple Watch Settings: Within Your Bigger Running Gear Strategy
Settings are just one piece of the gear puzzle. The Best Apple Watch Settings: make your current device as effective as possible, but they also highlight where you might eventually need different hardware—whether that’s a newer Apple Watch model or a dedicated GPS watch.
As you refine your settings, pay attention to:
- Battery constraints on long runs.
- Screen readability in sun and rain.
- GPS or HR consistency on your typical routes.
If you find your needs outgrowing your current device, it may be time to consider whether a next‑gen running watch or display type fits you better. Comparisons like Should You Upgrade Your Running Watch for AMOLED and Smarter GPS? can help you weigh options without falling into pure gadget chasing.
Sample Configurations for 5K, 10K, Half, and Marathon Runners
5K‑Focused Runner
Goal: Short, fast sessions; clear intensity control.
- Workout Views:
- Screen 1 (Easy): HR, distance, time, cadence.
- Screen 2 (Workouts): Lap pace, lap time, HR zone, total time.
- Alerts:
- HR high alert to prevent overcooking easy days.
- Pace alerts tightly bounded for intervals and race‑pace runs.
- Other:
- Auto‑Lap every 1 km or 0.5 mile.
- Focus mode enabled for every run.
10K‑Focused Runner
Goal: Blend of speed and endurance, slightly more volume.
- Workout Views:
- Screen 1: Average pace, distance, time, HR.
- Screen 2: Lap pace, lap distance, HR zone, cadence.
- Alerts:
- Moderate HR high alert.
- Pace alerts for tempo and threshold runs.
- Other:
- Auto‑Lap every 1 km or 1 mile.
- Sleep tracking enabled, watch worn nightly.
Half Marathon Runner
Goal: Build stamina, execute even pacing over 21.1 km.
- Workout Views:
- Screen 1: Rolling pace, distance, total time, HR zone.
- Screen 2: Lap pace, lap time, cadence, average pace.
- Alerts:
- HR high alert on long runs to keep them aerobic.
- Pace alerts for race‑pace segments and progression runs.
- Other:
- Battery‑saver tweaks for long runs (reduced brightness, limited notifications).
- Sleep + HRV monitoring to adjust training around life stress.
Marathon Runner
Goal: High volume, long long‑runs, and precise race‑day control.
- Workout Views:
- Screen 1 (Easy/long): HR, distance, duration, average pace.
- Screen 2 (Race‑pace / tempo): Lap pace, total time, distance, HR zone.
- Screen 3 (Race day): Lap pace (large), distance, time.
- Alerts:
- HR high alert for long runs.
- Narrow pace alerts for marathon‑pace workouts and race.
- Other:
- Focus mode for long runs to stay mentally steady.
- Battery optimization: lower brightness, offline music, periodic GPS checks.
Regardless of your race distance, think of these as templates. Adjust screen fields and alerts as your fitness and goals evolve.
Troubleshooting Common Apple Watch Running Problems
Problem: GPS Distance Seems Off
If your runs are consistently too short or long compared to measured routes:
- Update watchOS to the latest version.
- Make sure Location Services are enabled “While Using.”
- Avoid starting under heavy cover; let GPS lock for 15–30 seconds.
- Compare over multiple runs; ignore single outliers.
If treadmill distances are off, remember that Indoor Run relies heavily on arm movement. Calibrating with outdoor runs can improve it slightly, but treadmills themselves can be inaccurate.
Problem: Heart Rate Spikes or Drops Unrealistically
Optical HR sensors are sensitive to:
- Loose straps (tighten so the watch doesn’t move when you run).
- Cold weather (poor blood flow to the wrist at the start).
- Tattoos or very dark ink under the sensor.
Solutions:
- Wear the watch a bit higher on your wrist, snug but comfortable.
- Warm up gently for 5–10 minutes before relying on HR data.
- For truly precise HR needs, pair a Bluetooth chest strap.
Problem: Battery Drains Too Fast on Long Runs
Try the following adjustments:
- Turn off Always On Display.
- Lower screen brightness and wake duration.
- Disable unnecessary notifications and background apps.
- Use offline music instead of streaming.
- Charge to 100% and avoid starting long runs under 50% if possible.
If your watch still can’t handle your longest runs, that’s a sign to review your overall device strategy rather than just settings.
Problem: Too Many Alerts and Distractions
When the watch becomes annoying, you’re less likely to wear it consistently. Fix this with:
- A dedicated “Running” Focus profile.
- Only 1–2 key alerts per run (e.g., HR high alert and distance splits).
- Simplified workout screens with fewer metrics.
Run first, debug later. If you notice annoyance mid‑run, mentally note it and fix that setting immediately afterward.
Next Steps: Turn Settings into Real Training Progress
You now have a roadmap to the Best Apple Watch Settings: for running—seven core tweaks that turn your watch from a generic fitness gadget into a focused, low‑friction training tool:
- Build simple, purpose‑specific Workout screens.
- Dial in timing: auto‑pause, auto‑lap, and your start routine.
- Use HR zones and pace alerts to control effort.
- Optimize GPS, routes, and safety features for outdoor runs.
- Adjust screen, battery, and Focus modes for long runs.
- Enable recovery and sleep tracking that shapes training decisions.
- Match workout types and race‑day configs to your goals.
The real power comes when these settings support a smart training structure: a mix of easy runs, quality workouts, and patient progression. If you’d like to go beyond settings and into how to structure plans that adapt to your life and your data, resources like How Adaptive Running Plans Deliver 3 Proven Powerful Gains can help you connect what your watch shows with what your training should do next.
Take 20–30 minutes before your next run to walk through these settings. Then, for the next few weeks, treat your Apple Watch as a quiet partner: it taps when you drift, shines when you need clarity, and otherwise lets you enjoy the best part of all this technology—simply running.